Why Fairies Don’t Say Thank You


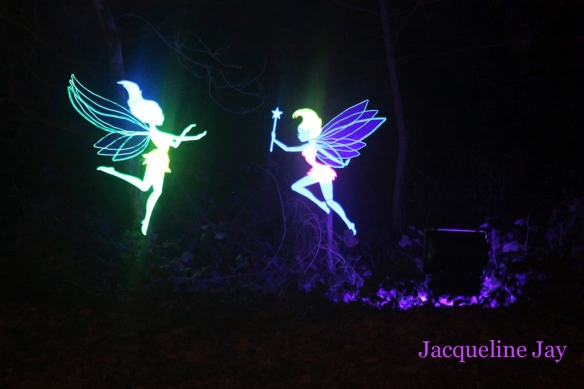
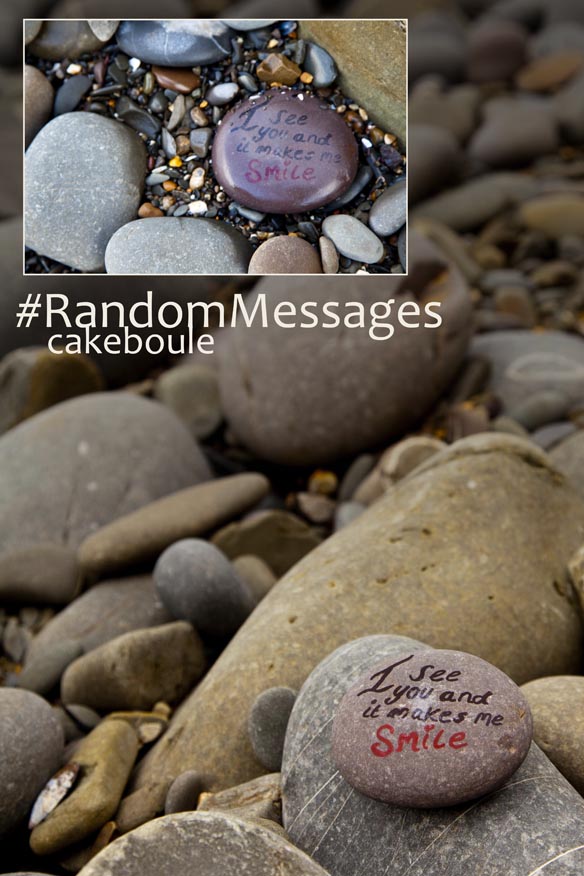
If you want to get a fairy really angry just say ‘thank you’ to them. Fairies live in a society where ‘thank you’ is the worst swear word that can be said by an unknowing human. They are far more likely to forgive you for deliberately stamping on their foot a hundred times or dunking them in a well, than if you utter those two words of blasphemy in their presence.

Enchanted 4Let’s turn the tables and imagine for a moment that you’re a Fairy; you’ve toiled to complete a particularly arduous task for a human and they dare to utter those words in response. You take the required sharp intake of breath to fuel the red mist above your eyes and all rational fairy thoughts have left the building. You explode into an unstoppable rage that involves gnashing teeth and clenched fists. The human stands back, looks at you all confused, and comments ‘how odd Fairies are’. You reply as calmly as possible that ‘thank you’ is like a magical human spell that dismisses the work you’ve just done so that it becomes instantly forgotten, like a piece of chewing gum hiding inside fluff in the corner of your coat pocket. You add, ‘that right now you’d like to give them the biggest wedgie ever and if they ever dare to say that to you again – you will’.

thank you fairies

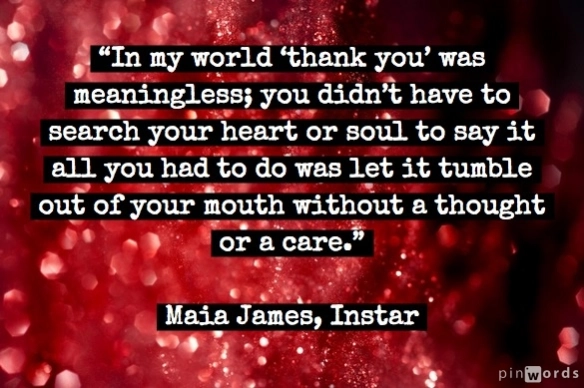
 I never gave my use of ‘thank you’ a single thought until the main character in ‘Instar‘ (Maia) attempts to say ‘thank you’ to a Fairy called Caspian. She quickly learns to avoid the word at all costs, but to understand how this would really feel I spent a week acknowledging deeds without using Fairy swear words (thank you). I can honestly say I never realised how many times a day I said those words until the second they were taken from my vocabulary. After a door was opened or someone passed me something I was left with a silent void and I fidgeted on the spot while the other person stared at me with expectation gleaming in their eyes. My automatic response system kicked in and the words formed inside my mouth where they bubbled and frothed, and fizzed, like an over agitated alka selzer ready to be ejected into the atmosphere and splatter across the recipient’s face, like a ‘thank you’ version of ‘you’ve been tangoed’.

Maia-thanks

Truthfully, keeping those words locked inside my head proved a far harder task than I’d ever thought it would be. As the week wore on I began to find alternative words and gestures to fill the awkward moments. And, then it became clear; Fairies aren’t being awkward or rude by not saying thank you; they are making sure their actions speak louder than words. They choose the more meaningful option of ‘show and not tell’. In my novel Instar, Caspian explains; Fairies rarely say ‘thank you’ to each other because the gesture binds them to watch over the recipient’s life with their own. Now, when you put it like that you begin to reconsider using ‘thank you’ with such abundance, as there’s no way you’d want to be indebted to some of the people you say thanks to every day.

ButterfliesBookmarks2

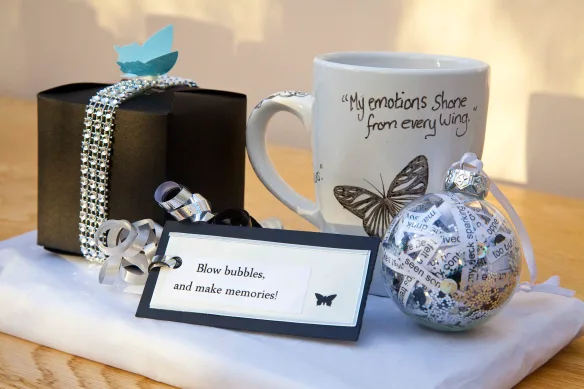
By the end of the week I found a smile and a nod went just as far, if not further than saying ‘thank you’ and using other words challenged me to think more deeply about the gratitude I wanted to convey. I realised that it’s the repetition of words like ‘thank you’ and ‘I love you’ that truly lessens their value. Perhaps, Fairies are teaching us that we need to put more effort into the words we say regularly and make sure the words we really mean are felt and not just heard. With this in mind, my thoughts turned to my group of readers who are known affectionately to me as ‘Team Alpha’. These people willingly stepped inside my story bubble and became part of my World and I wanted them to have a memory to keep, and to feel my thanks, and as they’d just read my novel about Fairies it seemed wrong to get a card with the biggest fairy insult plastered across the front.

Butterflies Bookmarks

So I made them gifts instead, but honestly and truthfully if I was a Fairy I would say ‘thank you’ to each of them because I’d gladly watch over their lives with my own as that’s how much they mean to me. For me, a novel is never written alone, its written alongside, and for those I cherish. I may come up with the ideas but it’s their feedback, which allows the story to go through metamorphosis and one day turn into a beautiful butterfly.

TeamAlpha

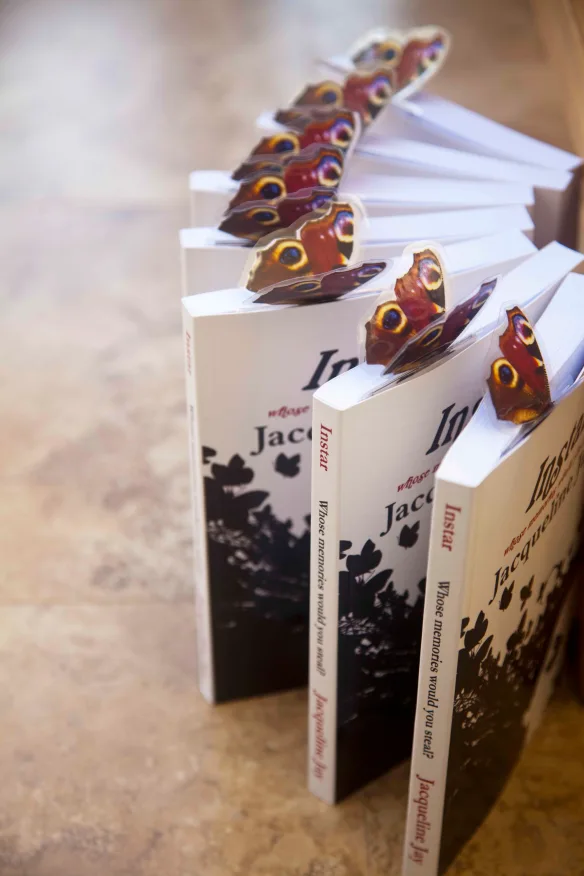
You can see their comments and more about me on my Facebook page. Stop by, like and share in the magic 🙂  and there is more on Pinterest where you can still find all the links to my recipes as well as the board for my book – Instar or my full site can be found at www.jacquelinejay.com as I will not be able to post all my posts on here forever, but you all seemed to be still enjoying them so I thought I would share.

A book is born: Instar on Pinterest


The most common question an author is asked is; ‘where do you get your ideas from?’ One of my favourite films is ‘Finding Neverland’ and the reason I love it so much, is because it shows me how the story of Peter Pan came to life. Ok, I also admit freely that I blub like a baby at the ending every time. But, the truth is I also love it because I’m curious, and I need to know how ideas start.

Follow Jacqueline Jay’s board A book is born – Instar on Pinterest.

A Pinterest board works in the same way, so today I grant you snooping rights with a behind the scene’s tour of the same visual journey I took to write Instar. You get to walk in my pinning shoes, and discover more about my characters, the story and locations used. Now you can see how, and where my ideas came from.

Come and join me in the never seen before world of “Instar”, a story about a seventeen-year-old girl called Maia James, who is plagued by cold shivers so intense they make her bones judder, and every time it happens her memories seem to disappear, like someone or something is stealing them? She wishes she had the power to steal memories but she never expected to get it.

Get updates on Facebook, tumblr or my website.

Cakeboule has changed (Pink Lemonade Cake Anyone?)


What happened to Cakeboule?

Pink Lemonade Cake

Did she fall inside this cake?

Sadly I didn’t, but through writing this blog I discovered what I loved most (apart from the copious amounts of cake) and that is writing stories. My favourite story from this blog was ‘Tales and Gales from a VW Campervan’, the dreaded ‘wee wee’ walk will always haunt me. The post also showed a spooky image of me which fired my imagination and led me to write a fantasy novel.  I really enjoyed sharing my stories with you, and I am excited to say, this isn’t the end of Cakeboule (as such) it’s the beginning an exciting new journey as author ‘Jacqueline Jay’. I will confess I am luring you to come across and join me in my new world by offering you a Pink Lemonade Cake receipe as my parting gift . Read on to find out more…

I’ve had no cake for months (it was torture) because all of my time went into writing my first novel: ‘Instar’.

Image

Instar is a fantasy novel for young adults (or not so young – I love YA) and is book 1 of a series about stealing memories.

Blurb

Seventeen-year-old, Maia James’ world was blown apart when her Dad vanished.  That was four years ago, but her Mum still says she can’t remember what happened that night. Maia is convinced she’s lying, and all she wants to know –  is the truth.  Maia’s obsessed with memories because she’s plagued by cold shivers, which make her bones judder, and each time it happens, her memories seem to disappear, like someone is stealing them.  She was right; someone or something is…

You can see the book trailer (a work in progress) here or on my facebook page.

Pink Lemonade Cake!

You can still enjoy my random little tales over at www.jacquelinejay.com/blog and there will be the occasional receipe – one of my charachters ‘Mrs Aston’ makes an awesome chocolate cake and she’s baking obsessed ,so it seems fitting that I discover what sort of cake she would have made in real life.

Here it comes

My parting gift to my dear readers (here comes the catch!) is the recipe for ‘Pink Lemonade Cake’ which was the last cake I baked, and it’s worth a few clicks I promise as there is no other cake out there like it – this is my own creation. When I get over 150 likes on my facebook page then I will post the recipe on my new blog just for you as my farewell and welcome – don’t miss it – sign up for email updates now – you can easily cancel at anytime.  So here is the deal:

1. If you don’t want to miss my Pink Lemondae Cake reciepe – then add your email to my new blog www.jacquelinejay.com/blog where you will shortly find a collection of stories.

2. Feel free to join me once more by either or all of these social media places; twitter, facebook, pinterest ( where all of my receipes still live) or instagram

Look forward to seeing you soon x

SIgning off as Cakeboule and saying Hello Jacqueline Jay

Irish Coffee Cake


Irish Coffee Cake 1

As I sat drinking a break time coffee wishing it was an Irish version, I realised that within my daylight hours I resided in a regimented World punctuated by bells, demands and deadlines. On top of that I’ve two self-inflicted days of fasting followed by five days of visiting the ‘Land of eat whatever I fancy’. Life felt too controlled, I longed to be free even if just for 10 minutes so I hatched a cunning lunch time plan that involved:

  1. Desertion
  2. Crime
  3. Smuggling contraband

Irish Coffee Cake 4

That does sound grand, but you’ll be glad to know that the contraband was in the form of Irish coffee cake which is the most acceptable way to bring alcohol into the workplace (ooh I’m so naughty).

I tortured myself by making this cake on a fasting day; there was no licking of fingers, bowls or sneaky tasting therefore its success remained a mystery until the next day (I know I’m so hard-core in the self-torture department). When I took these pictures I had to wrap the cake slice up and yes that was very hard, I may have licked my computer screen just a little bit but don’t tell anyone.

Irish Coffee Cake 5

As the following lunch time at work arrived I threw off my goody two shoes veil to become a wicked woman about to take a walk on the dark side. I deserted my post, stole out of the confines and told myself I could just keep on walking if I didn’t feel any better after five minutes. Trees whispered, birds darted past and teenager’s feet stampeded for cover as I inadvertently walked past their secret cigarette lair all of which made me smile.

Irish Coffee Cake 2

I felt so much better that I turned back towards the hallowed halls. Feeling stronger I dared myself to commit a detention nominated crime by entering a clearly marked exit door and skipped up the one way only stairs. There was one mission left to complete as I crept back into my office trying to hide the flush of fresh air which had reddened my face. I pulled out the contraband, my hands shook slightly as I opened the foil hiding a cake cocktail* of rich coffee with Baileys white chocolate buttercream. The time was now, fast day was over and there was only two more minutes of peace before the bells tolled so I took a big bite and realised there is truth within the words ‘naughty but nice’. The cake tasted exactly as I imagined it, I felt like I’d been transported to a glitzy restaurant where I indulged in an Irish coffee over lazy chatter.

It’s the little things in life that matter, you’ll never say on your death-bed ‘I’m so glad I spent all those hours at work’ instead why not take just 10 minutes for yourself and be a little bit naughty next lunch time. Your work will be better due to lower stress levels which results in an increase in effectiveness and cake always boosts happiness so what’s to lose?

*always eat cake responsibly

Traditionally, Irish coffee consists of hot coffee, Irish whiskey, and sugar stirred and topped with thick cream I have altered this idea to fit my cake vision (fresh cream wasn’t that practical for transporting) but feel free to adapt it anyway you wish.

Irish Coffee Cake 3

Irish Coffee Cake

Coffee Cake Ingredients

400g Salted Butter (room temperature)
400g Caster sugar
400g Self raising flour
8 eggs
5 tbsp espresso ground coffee (instant) mixed with 3 tbsp of boiling water

Instructions for Coffee Cake

1. Pre heat the oven to 160 / 140 fan or Gas 3
2. Line two deep 20cm tins (do use the right size tins to avoid disaster)
3. Beat the butter and sugar until fluffy (5 minutes as this is what makes the cake rise so beautifully to get the full big cake wow factor so not skimp this part. I also find that using very soft butter (but not liquid) helps the creaming process)
4. Add the eggs two at a time and sift quarter of the flour into the mixture and beat until combined
5. Repeat until all eggs and flour are used up
6. Add coffee extract and mix
7. Place the tins in the oven on the middle shelf for approx 50 minutes (all ovens vary so check your cake after 45 mins)
8. Cakes are ready when the skewer can be inserted into the cake and it come out clean.
9. Leave in the tin for 5-10 minutes before removing and placing on a wire rack to cool

White Chocolate and Baileys Buttercream Recipe

250g Salted Butter (room temperature)
500g Icing sugar
250g White chocolate melted
125ml Baileys (or cheaper alternative!)

White Chocolate and Baileys Buttercream Instructions

1. Beat together the butter and icing sugar until light and fluffy
2. Melt the chocolate ( I do mine in 10 second stints in the microwave)
3. Let the melted chocolate cool slightly (10 mins)
4. Pour the chocolate into the buttercream mixture in small quantities beating as you do until all the chocolate has been incorporated.
5. Add the baileys and beat to combine one last time

Assembly of the Cake

1. Level the cake that will be the bottom layer
2. Smother the bottom layer of cake in buttercream and add the top layer of cake
3. Smother the top of the cake in buttercream, make spiking patterns with a palette knife
4. Cover with grated chocolate

      5. Eat and enjoy your naughty contraband

Happiness Bombing with 99 Random Messages


What can you do when on holiday in North Devon, it’s cold and your husband is spending time kissing the sand on the beach and not you (aka Power Kiting). I had a little idea which I named ‘happiness bombing’. Based on glamour bombing which involves leaving mystical messages to make people believe in fairies I adapted it slightly by creating inspirational messages in the hope it might make someone smile. Within a day or so of collecting and writing messages on pebbles, creating handcrafted letters and making tags to go onto bubble wands I realised I had 99 random messages to mysteriously plant along the North Devon coastline for walkers and families to find.

Random Message image 2

The first day arrived and I crammed my bag full of messages, heaved it onto my shoulder and felt like a strange variant of the Easter Bunny.  My stomach was sick with nerves and knew I had to find courage to leave these random acts of kindness style messages somewhere for strangers to find.  Taking note of my own pebble message ‘it only takes 20 seconds of intense courage’ I ignored the incessant calls from Mrs Negative telling me ‘You can’t do it’ and I womanned up and set off after taking a deep breath.

Courage image

Once on the pebble beach I found myself loitering suspiciously waiting for people to pass so I wouldn’t be spotted. As I stumbled over the rocks towards the main beach I realised I was just procrastinating to I casually stopped, dropped and rolled away a bit like a ninja but wtih far less finesse leaving a message pebble behind. I felt rather stupid doing this but willed myself to keep going in the name of making at least one person happy for a few seconds.

RandomMessages4

I didn’t stop to see messages being discovered as that was not my intention. Later that day I took myself off for a walk and fate must have decided to play a hand as I couldn’t help but notice a group of girls excitedly scouring the beach.  In one girls hand was a cream envelope and another had a pebble, together they ran excitedly to their Mum to show her their treasures. Gathering around a bench the girls tentatively opened the letter their heads bowed as they read the handwritten message. An hour later I could still see them on a ridge further down looking for more and it made me smile that at least I had given them the gift of looking for magic. The magic of possibility is often underrated as we get older.

Dreams

The next day I was sat out on my balcony with a coffee watching the waves still feeling rather silly after dropping off another round of messages when destiny stepped in again. I could hear a man and a woman talking below on the pavement.

2013-03-28_1364479470

“Where was it?” She asked.

“Over there” he said pointing to the steps leading down to the beach.

Curiosity made me peer over the balcony a little but not enough to be seen and they  both seemed to be searching the area.

“I think you have someone watching over you,” She remarked as she walked further down the path.

I couldn’t hear what the man said in reply as they had moved away but watched as they both stood silently deep in thought further down the promenade.

The next day I spotted one of my cards had been taken from its little plastic wallet (UK weather proofed!) and thrown it into a rockpool. I felt sad about this but I guess you can’t make everyone happy. Later I noticed it was gone, someone must have fished it out of the rockpool and taken it home or there are paper eating crabs in Devon? I realised that perhaps the message wasn’t for the first person who found it because it was meant for someone willing to get their feet wet in order to retrieve it who obviously needed it more.

RandomMessages5

Towards the end of my happiness bombing project destiny stuck out her sparkly sequinned foot and I tripped over it landing with a splat. As I opened my eyes right in front of me was a washed up pebble which I had planted further down the beach a few days ago and I laughed at the irony of being happiness bombed myself what were the chances of that?RandomMessages

One thing for sure magic was definitely at work in wintery North Devon this week I just gave it a little helping hand. Why not send out your own #randommessages and see for yourself what magic can happen.

RandomMessages3This is part of my own personal project at overcoming my personal villians which I call Mr Perfectionism, Mrs Negativity and Miss Procrastination whom have got so strong they’ve kept me from blogging and life itself. Together they work as a team to make me feel I am not good enough to blog but after many months I’ve decided I’ve had enough of listening to their whining so I’ve set myself a challenge to overcome them and each month I tackle something different that is missing from my life. Last month I worked on having more childhood fun with a 007 cupcake challenge for my family. This months challenge was to try to make others happy.

These villians worked hard together to stop me from completing this task before I even got to Devon but helping me beat them is my new superhero Destiny (the one with the sparkly shoes). Before you all cart me off to the psychiatrist I simply found that giving these traits names and charachters helps me to identify when they are at work! If you find these villians stopping you from truly living or having fun let me know and perhaps I’ll share my battle against them so far warts and all…
Lifes villians

Apologies there are no cake goodies for you today but I do have my mind set on something experiemental 🙂 You can however get a quick sugar rush and ideas about what to do with your left over Easter chocolate here with naughty hot chocolate fudge sauce and boy is it good!

ChocFudgeSauce2

p.s if you see this post it means I just beat Miss Procrastination (again)

Rolo Cupcake Challenge


I’ve been playing ‘hide and seek’ with cupcakes and it’s great fun! For the game to work I baked chocolate fudge cupcakes baked with rolo inside adorned with lashings of caramel buttercream.

Rolo Chocolate Cupcake

The Rolo hidden inside was what I hoped would make them a hide and seek cupcake. Although I froze the Rolos for 24 hours before hand in the hope they would remain somehow intact inside the cupcake sadly they didn’t but who cares when your welcomed by an explosion of moist fudgy chocolate cake.

Rolo Chocolate Cupcake

Homemade caramel was added to the buttercream and then drizzled with chocolate and caramel sauce and of course a Rolo completed the ensemble.

Rolo Chocolate Cupcake

Then the fun began! Yes fun! I had to write it twice to remind myself as life rang me the other day:

“Excuse me I’m looking for fun.”

Err, I don’t know where she’s gone?” I replied whilst looking up at the ceiling wondering if she was perhaps hanging off there with the remnants of mis-tossed pancake. “Perhaps she’s gone out with childhood wonder and laughter to play.”

“Hmmmm,” Life replied. “When she gets back get her to give me a call”

“Oh, OK.” I sang before a forceful slam reverberated in my ear drum which signalled the end of the conversation.

It was then I realised fun, wonder and laughter must have got bored waiting and gone off exploring without me. After sulking for a few days I had an ephinay of sorts. I could find fun again, yes it might take some work but I was sure I could track them all back down eventually. I set myself a challenge for three weeks as I believe things should and do always come in threes. This challenge would be based on me, us and them. For me: I wanted fun back even more than ‘twihards’ want Edward to show up in their living rooms so they can breathe ‘bite me you sexy beast’.

So I set about wondering and came up with this:

  1. Could I bake a Rolo inside a cupcake and it still be whole?
  2. Is it possible to play a game involving cupcakes?
  3. Could I find fun, bring her back and share her with my Husband and teenage son?

The answer was no, yes, yes in that order. The hide and seek cupcake game is easy with two variations:

  1. Hide cupcakes around the house whichever are not found are yours so hide well and give them a time limit to find them. Hmm about 10 seconds seems fair.
  2. Set a 007 challenge to overcome household obstacles in a race against the clock to find the cupcake in 70 seconds and return back to the starting point and sing the 007 theme tune. If you haven’t seen the coke zero version of 007 challenge you must watch it for inspiration! Think locked doors, chairs, discarded toys, rogue shoes and people getting in your way so pretty much like a normal day but with cake.

They both moaned initially when they realised they had to play a game to get their cupcake but when the countdown started they couldn’t stop their little faces lighting up. You see there is nothing loved more by men than a challenge which involving man V food.

From this challenge I learnt that fun is still out there and although admitedly she just pops in every now and then I aim that one day she might stay a bit longer until the day she moves right back. When you have fun you might notice that the other people in your life seem happier too and when you share the fun you get to witness that sparkle appear back in their eyes that you forgot existed. I’m not quite at the end of my three week challenge but it makes me wonder what else can I do for 21 days?

Try it out yourself: give yourself permission to go and play ‘hide and seek’ cupcakes and find out that fun might just be waiting patiently for you to invite her back in.

Ingredients for Chocolate Fudge Rolo Cupcakes

130g room temperature butter
3 fl oz / 95 ml of boiling water
3 tsps strong coffee granules
75g Self raising flour
75g plain flour
30g cocoa powder
¼ tsp bicarbonate of soda
300g caster sugar
2 eggs (room temperature)
5 tbsp sunflower oil

70ml sour cream

Chocolate Fudge Rolo Cake Instructions

  1. I froze my rolos for 24 hours (but up to you if you wish)
  2. Preheat the oven
  3. Line a muffin tin with liners (my mix made 13 cakes so I left one to bake later)
  4. Mix coffee with boiling water and add to a pan with butter and chocolate
  5. Heat the mixture gently to melt
  6. Sift all dry ingreadients into your mixer bowl
  7. In a bowl combine and mix eggs, oil and courcream
  8. Add both the egg and chocolate mixture to the dry ingreadients
  9. Mix on low (2 for Kitchen aid) until combined
  10. Add approx 2 tbsp of mixture (I use a cookie scoop)
  11. Add one rolo in the centre of each and top with further tbsp. to cover the rolo
  12. Bake in the oven for 20-25 mins until the top springs back when touched or cake tester is clean
  13. Leave to cool in the tin

Caramel Buttercream Ingredients

125g caster sugar
4 tbsp of water
80ml double cream
½ tsp of salt (optional but does bring out the flavour)
1 tsp of vanilla essence
160g butter
200g icing sugar
2-3 tbsp of milk (if needed to make the buttercream lighter for piping)

Caramel Buttercream Instructions

  1. Heat the sugar and water in a pan until the sugar has disoloved
  2. Continue cooking until it turns a golden colour and thickens slightly
  3. Remove from heat and add cream be aware it may splutter so be careful
  4. Stir and leave to cool
  5. Cream butter and icing sugar for 5-6 mins (Kitchenaid gradually increase to speed 6 once combined)
  6. Add caramel and beat until combined (reserve some caramel to drizzle over your cupcakes)

To Assemble

Pipe or cover your cupcakes with lashing of caramel buttercream, drizzle melted chocolate and caramel over the top and adorn with a Rolo. Then go and hide them, trash the house and set the timer 🙂

Chocolate Orange Marble Cake


Sometimes you want cake and you want it right now! Yes a great big wedge of cake on your plate with a fork in your hand ready to devour it.  I adore all the beautiful mini treats and cakes like Sarah from Maison Cupcakes makes there are those times where large is the only thing that will feed your craving. This cake was for one of those times.

Chocolate Orange Marble Cake

Beautiful swirls of chocolate and orange cake smothered in a chocolate orange buttercream and topped with grated chocolate orange and the best bit is it is messy so perfect for finger licking.

Chocolate Orange Cake

This is pay-day cake 6 on the list do stop by my recipe page to see the others – as always think large as there are no small pay-day cakes in my collection.

Chocolate Orange Marble Cake

To all my followers I wanted to let you know the Cakeboule is going offline for the Summer to recharge the baking batteries. So I’ll leave you with this massive slice of cake and as Arnie says ‘I’ll be back’.

Chocolate Orange Marble Cake

Have a great Summer everyone and I hope the sun shines wherever you are. Go and make happy memories as that is what I intend to do. Ta Ta For Now.

Chocolate Orange Marble Cake

Chocolate Orange Marble Cake Ingredients

400g soft butter
400g caster sugar
400g self raising flour
8 eggs (must be fresh)
50g cocoa powder
1 tbsp milk
1.5 tsp orange extract
2 oranges (grated rind only)

Chocolate Orange Marble Cake Instructions

1. Preheat the oven to 160 / 140 fan or Gas 3
2. Line two deep 20cm tins (do use the right size tins to avoid disaster)
3. Beat the butter and sugar until fluffy (5 minutes as this is what makes the cake rise so beautifully to get the full big cake wow factor so not skimp this part. I also find that using very soft butter (but not liquid) helps the creaming process)
4. Add the eggs two at a time and sift quarter of the flour into the mixture and beat until combined
5. Repeat until all eggs and flour are used up
6. Split the mixture into two bowls equally (I weigh mine to be sure)
7. Add 50g of cocoa and 1 tbsp of milk to one portion and mix to combine
8. Add orange extract and rind to the other portion and mix to combine – I also added a small bit of orange colouring to make the orange colour stand out more but this optional)
9. Take two big spoons and alternate dollops of chocolate and orange mixture into both tins trying to make sure you have equals amounts (you can weigh your portions to be sure if you wish)
10. Use a knife or skewer and run it through the mixture to create swirly patterns  do not over do this or you will not end up with the big swirls but a combined mess!
11. Place the tins in the oven on the middle shelf for approx 50 minutes (all ovens vary so check your cake after 45 mins)
12. Cakes are ready when the skewer can be inserted into the cake and it come out clean.

Chocolate Orange Buttercream

250g soft butter
500g icing sugar
100g melted plain chocolate
1.5 tsp orange extract

Instructions

1. Beat together the butter and icing sugar until light and fluffy
2. Melt the chocolate
3. Let the melted chocolate cool slightly (10 mins)
4. Pour the chocolate into the buttercream mixture in small quantities beating as you do until all the chocolate has been incorporated.
5. Add the orange extract and beat to combine one last time

Assembly of the Cake

1. Level the cake that will be the bottom layer
2. Smother in buttercream and add the top layer
3. Smother the top in buttercream and make spiking patterns with a pallete knife
4. Cover with grated chocolate orange

Devour! See you soon 🙂

Gooey Popcorn Bars (Gluten Free)


Say sod it and call a movie night with a gooey, toffee, marshmallow and chocolate covered popcorn bar in hand.  Seek pleasure watching the silky caramel strands form as you pull the bars apart. This is a quick tray bake but with no baking (bonus!) but guaranteed to brighten up the dull and miserable summer we are having and great for big kids parties.

Popcorn Bars

I have never made popcorn before and I was more than a little bit excited when I saw fluffy white clouds pinging around my saucepan. Truthfully I was that excited I had to call the entire family to watch a miracle in the pan. If you have never made popcorn before then you truly have not lived.

Popcorn Bars

This recipe is an adaptation of my toffee crispie treats. After spending days discussing films set in New York with a friend I am now eager to sit down with one of these next week watching chick flicks to my hearts content so go on let it rain see if I care.

Popcorn bars

Of course you can top them with anything you like as this is an easily adapted recipe. I like the idea of twix or malteaser topppings or give it blast with some popping candy a la Heston style.

Popcorn BarsThe cat loved them too as he sauntered into the photograph, sniffed and then bit my finger!

Popcorn Bars

Enjoy!

Ingredients

250g toffees (Sainsbury’s Basics)
50g butter (room temperature)
3 tbsp of milk
1 tbsp of golden syrup
115g marshmallows
80g popped popcorn

Instructions

1. Brush your a 20cm square tin (or other suitable) with baking spray or oil and wipe with a kitchen towel to make sure it is not too oily.
2. Add toffee, golden syrup, butter and milk into a saucepan and heat gently.  Stir the mixture as it heats until all the ingredients have melted.
3. Add marshmallows and stir until they have melted.
4. Add the popcorn to the pan and make sure it is well coated with the toffee mixture
5. Pour quickly into prepared tin and flatten it down well with the back of a wet wooden spoon.  Add whatever toppings you fancy by pushing them down gently into the mixture so they set into to it.
6. Leave to set (about an hour) and cut into sizes required and eat (one is not enough) they will keep for about 5 days if they get that long in an air tight container. Do not place in the fridge or the pocorn will go soft.

Up next – Pay Day Cake 6 time!!!! (see previous here)

I am entering this into the Teatime treat competition hosted by the talented Karen from Lavender and Lovage and the theme this month is cake stall cakes and I think this will fit quite nicely.

Take a break from the grey and bake


2012 is officially the colour of Grey. Floods and continual grey skies create the perfect reading opportunity for stuck indoors women in their millions to one by one drop like flies and seek comfort in the arms of the infamous Mr Grey. I can’t go anywhere without hearing constantly  ‘I’m spending the night with Christian’, ‘I got the last copy whoop whoop’ and my personal favourite ‘I wrestled the woman in Tesco’s for it and won’    Honestly all this grey has turned my female social media friends into whipping, drooling and silk scarf frenzied sex kittens.  As with all good things Ladies you have to take a break some time or bits start to fall off so walk away from Grey and Greyer, give your racing hearts and imaginations a rest. If you really have a need to tie yourself to things that’s fine just tie yourself to the food mixer or oven door and get it over with. You all have to eat sometime so join me in my top ten round-up of bakes over the year and I hear the naughty chocolate fudge sauce is good if that’s your sort of thing.

Number One – Strawberry Pimms Cake Pop Truffles

Pimms Cake Pops / Truffles

Pimms Cake Pops / Truffles

This is where it all began and I really enjoyed making these and I think at the time that was probably because at the beginning it did not matter if the cake I baked was wonky or imperfect as it got smooshed up with various fillings to create a mouthful of heaven. If you roll cake balls in meringue before dipping them in chocolate you have an Eton mess variation and perfect for when you need something ball shaped that isn’t salty.

Two – The mis-piped naughty meringue snowmen

My piping disaster (keep on reading to see more!)

See these were a bit of a baking disaster and most of you who have spoken to me over the year will have chuckled at these.  I was not the best at piping back then and figured that the little snowmen rather naughty looking tails would go down in the oven.  Hmmm I guess I was wrong with that one however they will star on this year’s Christmas cards!

Three – Pay Day Cakes  ‘The Macchiato’

The ‘Pay Day Cake’ idea began in March with the premise that you do not scrimp on ingredients but bake a cake that has four layers in a celebration for each week worked. This one is the Machiatto based on the coffee, vanilla and caramel drink at Starbucks. After this followed Sticky Toffee Pudding Cake, The Turkish Temptress and White Chocolate Mousse cake with a secret berry blast that will keep your admirers wondering how you did it? The final cake so far is triple chocolate mousse cake with chocolate covered strawberries – do I pick the longest names or what? What next a fifty shades of grey cake how would that work?

Sticky Toffee Cake

 FourVanilla Essence (DIY)

Homemade Vanilla Essence

A great gift to you or a baking friend – why not make a few at the same time.

This has to be on the list as it is the one ingredient I use in all of my bakes – simple to make, full of flavour and saves £££ and if you add lemonade to a shot of it you have a vanilla vodka spritzer – love the dual purpose nature! Comes with a humourous tale of baking meltdowns.

FiveMojito inspired Polenta Cake

Mojito polenta cake

Polenta cake – this is a dairy and gluten-free option you know you will be safe most places you need to take cake. Moist, tangy, easy to make and very portable with no fussy icing to worry about – bake it and job done and if you like it try the lemon and berry version.

SixJammie Dodger CheesecakesJammie Dodger Cheesecake

Perfect little pick me up with a creamy cheesecake, jamminess and biscuit all rolled into one. You would think a soft biscuit base wouldn’t work but it really does and cute too.  Comes with a tale about synchronicity.

Seven – Raspberry Bakewell Cake

Raspberry Bakewell Cake

Another dairy and gluten free cake (but you would never know) that is just as good as a Bakewell tart but far less hassle. I have a love of simple loaf cakes and my top tip is buy cake liners for your tins to save time from fiddly lining with baking paper. Why not try out Left over Banana, honeycomb and chocolate or Lemon and Blueberry.

EightNaughty Chocolate Fudge Sauce

Just perfect for pouring over ice-cream sundaes, traybakes, puddings or whatever else takes your fancy but I don’t want to know about it thank you very much. Keeps in a jar in the fridge and then just heat and pour over your choosen dessert or body parts includes cute labels as well so you can give it as a gift but please don’t tie the labels to body parts as that would just be wrong.

Nine – Palmiers, Berries and Macaron Ice-Cream

Juicy berry Palmiers with ice-cream oozing with berries and crushed macarons which is the perfect use for them if they have gone hideously wrong as mine do. Accompanied by a funny story of blackberry picking disasters and walking like John Wayne but without needing Mr Grey to do that for me.

TenSprinkle Spiral Cookies

Made for Valentines day with love and such fun to hang on the side of cups (if you cleverly cut them as soon as you take them out of the oven before they begin to harden. Any colour or flavour would work with these and they freeze well so you can make ahead and bake when needed. I keep a frozen cookie roll in my freezer which also serves as a back up weapon to ward off any intruders. Please don’t get any ideas of putting cookie rolls anywhere they shouldn’t go as that would be a hard one to explain at the NHS walk in centre.

Hope you enjoyed my round-up and here’s to more bakes ahead. As for Mr Gey I’m avoiding you for the moment as my kitchen is my own version of a ‘red room of pain’ where I’m often found weeping in dispair, involunatrily tied up in piping bags or yelling with sheer baked ecstacy all without having read the trilogy.  Apparently there is expected to be a 50 shades baby boom which will lead to some interesting questions for those parents in the next decade.  I can imagine their conversations now, ‘Mum, how was I concieved?’ and the reply ‘Well Your Dad tied me to the Kitchenaid and I spanked him with the beater attachment whilst balancing a cupcake on my head’ oh dear Mr Grey what you got us into?

Thanks to all who have supported me, commented, followed and the extra pounds my close friends and family have endured so far in my little journey. What was your favourite?

Love to all x Up next gooey popcorn bars traybake

Triple Chocolate Mousse Cake with Chocolate Covered Strawberries


Triple Chocolate Mousse Cake

Introducing Pay Day Cake 5 the triple chocolate mousse cake lovingly covered with chocolate covered strawberries.  This is probably not an eat in ‘best company’ cake as I find its destruction is accompanied by a loud drawn out satisfied sigh which you won’t realise you’ve made until you feel the heat of others eyes boring into you from all directions (they’re just jealous). Chocloate covered strawberriesIf you are kind enough to make this triple chocolate mousse cake for a special occasion you will find there are few people who can resist the sweet aroma of this celebration cake. Triple Chocolate Mousse Cake

A garden decorated with sparkly disco balls, candles and freshly made  pink lemonade jar cocktails greeted my Best Friend for her Birthday.  I am now known as the ‘Jar Lady’ which is a step up from the cat lady but only slightly. We had a great evening full of laughs, food and an impromptu random birthday dance that even the village people would have been proud of.

Triple CHoclate Mousse

As it turned dark I choose a song on my MP3 player but it randomly played its own choice of ‘It’s a beautiful day’ by U2 which I didn’t even know I had but it summed up the evening.  This was topped off with fairly lights that are not designed to twinkle but decided they would for ‘one night only’ in time with the beat for the entire song now how bizarre is that! I have no idea why these odd things keep happening but whoever is watching over me (maybe it’s the man in the photo that was taken of me on my recent holiday post) they obviously saw me having the time of my life and decided to add a bit of magic to an evening with friends that I will truly never forget.

You see the more you watch and pay attention to the World the more messages it gives you. Like it’s OK to have forgotten the candles when you find sparklers in the drawer you forgot you had but they were so much better.

Triple Chocolate Mousse

The laws of synchronicity are at work right now as somehow it decided you would stumble upon my little post which means you were destined to be here.  No matter how many years later you find this post share a little bit of mousse magic by passing it on to everyone you know and keep the Universe happy.

P.s the moment I pressed save my computer shut it self down of its own accord – this was to tell me to shut up I think – look Frugal Feeding I made it under 500 words whoo hoo albeit without the recipe 🙂

Day 1 – Bake the Cake layer (as in previous mousse cake post this is the second half of the layer)

Ingredients for Base Genesoise Cake Layer
75g plain flour
50g cocoa (good quality) or replace 50g flour for a plain base.
4 eggs at room temperature
125g caster sugar
30g melted butter (left to cool)

Instructions
1. Grease and lightly flour a 20cm round tin
2. Melt the butter in a pan and leave to cool
3. Beat the eggs and suga at a medium speed for 12 minutes until when you lift the whisk attachment out of the mixture falls in ribbons and pools on top of the mixture without disappearing straight away.
4. Sieve the flour and cocoa over the mixture
5. Fold in gently until combined
6. Drizzle in the butter and fold in – do not over fold or the cake will become tough – so when you think it is is nearly there and there are no huge lumps be brave and put it in the oven.
7. Bake in the oven on the middle shelf for 30 minutes
8. Leave to cool for 10 minutes before removing from tin and placing on a wire rack
9. Add 2 tablespoons of raspberry liqueur (Chrombards, Framboise) to 2 tablespoons of caster sugar – heat gently until the sugar is dissolved. Brush liberally over the cake to moisten it. If you prefer you can use a simple sugar syrup which is equal parts sugar to water and you can add a flavouring or substitute with another spirit.
10. Divide the cake into two layers using a long serrated knife.
11. Wrap the cakes in greaseproof paper once cool and wrap in foil. Either store in an airtight container until you need it or put it in the freezer.

Day 2 – Chocolate Mousse (based on Michael Roux – Desserts)

Ingredients
150g chocolate finely chopped
2 sheets leaf gelatin
50ml milk
1 1/2 tsp of liquid glucose
2 egg yolks
150ml whipping cream
30g icing sugar

Instructions

1. Set a bowl over a saucepan which is filled to one-third with water. To the bowl add the chopped white chocolate. Using a low heat wait until the chocolate is half melted and remove from the heat. The chocolate will melt by itself and this reduces the risk of it burning.
2. Soak the gelatin in cold water for 5 minutes. (optional)
3. Heat the milk in small saucepan until boiling point and then remove from the heat.
Squeeze out the water from the gelatin and add it to the milk. Stir gently until the gelatin has dissolved (optional)
4. In another bowl add the egg yolks, liquid glucose and 3 tbsp of warm water. Mix together until combined.
5. Whip the cream and icing sugar in another bowl until the cream leaves ribbon trails when you take the whisk out of the mixture.
6. Pour the hot milk over the white chocolate and gently mix with a whisk until there are no lumps and is it a smooth consistency.
7. Add the egg mixture to the chocolate and mix gently until combined.
8. Using a spatula fold in the cream gently until fully combined.

Assembly (phase 1)

1. Get your original tin that you baked your cake in – place the cake in the bottom (tip: use the bottom layer of the cake as the top layer will be smaller as cakes shrink as they cook). You can use the bottom layer for another cake.
2. Pour the mousse into the tin.
3. Place the tin in the freezer overnight for best results.

Day 3 – White Chocolate Mousse (based on Michael Roux – Desserts)

As above but replace the dark chocolate with white.
Take the cake from the freezer and pour white mousse mixture onto the cake and return to the freezer overnight or leave in the fridge overnight to set if serving the next day. The cake will last for at least one month in the freezer.

Day 4 – Strawberries & Eating!

1. Make Chocolate covered strawberries by melting 100g of chocolate in a bowl and dip the strawberries liberally into it.  Let the chocolate drip off the excess before placing on a sheet of greaseproof paper to set.  Melt some white chocolate (approx 50g) and drizzle over the top on the strawberries once set.  Either do this with the back of a spoon or  used a mini squeeze bottle.

2. To remove the mousse cake from the tin use a hair dryer or blowtorch to gently heat the tin so that it removes easily. Add the strawberries on top when you are ready to serve or the juices will escape and bleed into the cake.  Slice into portions with a warm knife (cleaning after each slice).

Enjoy!